In continuation to my previous post (Colors with the HDR-FX7 (part 1) – Improving the color green with custom Picture Profiles), here are the full results of practical field tests towards tweaking the AWB for better greens and a more pleasant image with the HDR-FX7.
The bottom-line is:
- Setting a Picture Profile with WB Shift -1 and Color Level +1 or even -2/+1 gives much nicer colors.
- Using a 3-step gray card also seems a quick and handy way to help secure the capture of consistent, reliable colors. However further caution and adjustments may be necessary because – a surprising observation – aiming at fully neutral white would be incorrect, yielding a noticeable overall yellow cast whereas the consumer’s eye instead seems to prefer some measure of blue in the color white.
- In the end however, AWB turns out to be too unpredictable on the HDR-FX7 and a big No-No unless you’re ready to spend considerable time color-correcting in post.
Equipment and tools for this test:
- Sony HDR-FX7E camcorder,
- X-Rite ColorChecker Gray Scale (3-step, mini or full size),
- EDIUS Pro with vectorscope and 3-way White Balance correction tool,
- Sony Bravia KDL-40X2000 Full HD LCD TV,
- Eizo FlexScan M1950 monitor,
- X-Rite Eye One Display 2 monitor calibrator and profiler.
Testing HDR-FX7 color settings with Auto White Balance
Here is the same scene with different settings for WB Shift and Color Level, and two frame grabs for each scene (with or without the 3-step gray card in front of the lens). This way I can present the vectorscope output for the whole image or for the gray target area alone. I also get a subjective impression by viewing the images both on the high-end Bravia or on my computer monitor (fully calibrated and profiled) with the colorspace-aware EDIUS Pro.
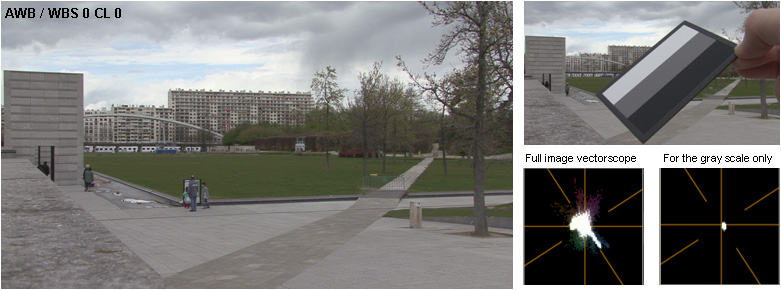
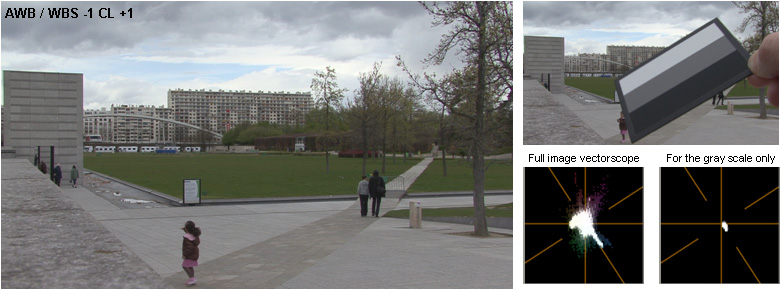
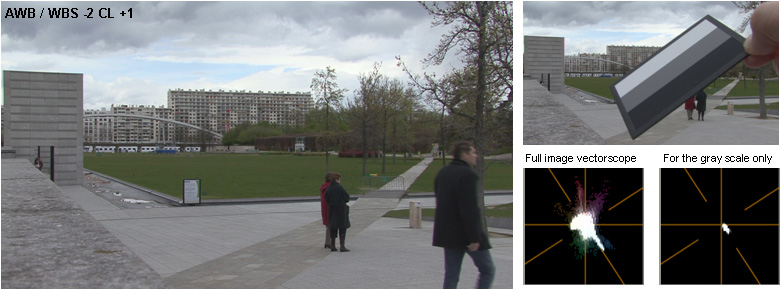
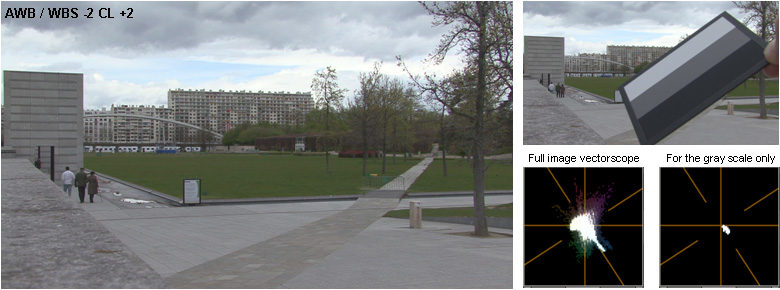
Here are my observations:
- With WB Shift 0 / Color Level 0, the image has a yellow cast and the stone floor appears reddish. However the neutral gray scale is slightly on the blue side already – that’s a surprise.
- Iterating through these values makes the image every step a bit bluer.
- With WB Shift -1 / Color Level +1, the image is more neutral and better in line with my recollection; the stone is close to neutral gray, the grass is a bit greener (although it is too early in the season to have nice vegetation here).
- But then, WB Shift -2 / Color Level +1 is really nice too.
- The grass is greenest with WB Shift -2 / Color Level +2, but here the image is getting too blue overall.
Now, it seems that the objective of improving the color green has been met here. I can’t really make up my mind between -1/+1 and -2/+1, I’d wish for something in-between. I’ll probably choose -2/+1 but more practice should tell, especially under sunlight…
One could oppose that the neutral gray target isn’t really neutral and introduces some color bias. But it is manufactured and sold for this very purpose – being neutral – and I tried with 2 different targets (mini size and full size) with similar results.
Securing predictable colors with an X-Rite ColorChecker Gray Scale
On to another test now, specifically focused on how the gray scale can help secure color balance:
- Hereafter, column A recaps the original raw images from the HDR-FX7E, for the 4 sets of values.
- Then for each scene, I applied the 3-way White Balance correction tool to the 3-step color target, to determine automatic color correction across the full luminance range. As a result, all pictures with different WB settings were corrected to a similar look & feel (column B). I won’t provide individual vectorscope screenshots here, but after correction each of them for the color target alone shows a perfectly centered position (i.e. color-neutral). So the 3-step color target seems quite effective in capturing a reference and bringing the image consistently back in line with that reference.
- However for a consumer’s taste, this looks even more yellowish than the camera’s default WB 0 CL 0, so this requires additional color correction towards the blue – by a fixed amount regardless of camera settings. In column C, I applied the exact same reverse correction to all four of them, to bring them all back to a look similar to WB Shift -2 / Color Level +1.
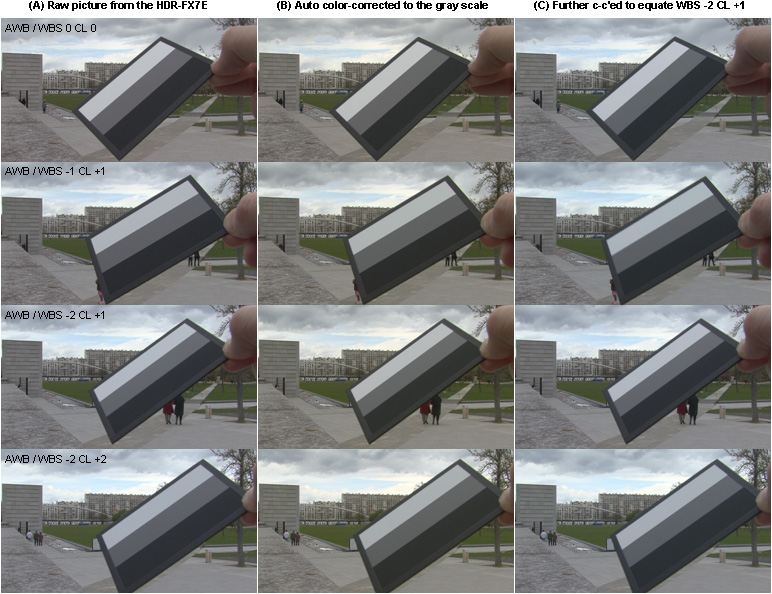
This is all a bit cumbersome all right, but it is apparently reliable and reproducible. That’s the point! In adverse conditions, a quick shot with the gray scale should bring some peace of mind, much appreciated when later you’ve left the field location and are facing the computer. It only takes a couple of seconds to show the mini gray scale in front of the lens to capture a reference shot, and it fits into a shirt pocket with a nice protection sleeve so you can conveniently carry it with you. The only, very important constraint is, the color target must be receiving the same incident light as the subject you’ll be shooting.
For future reference and use, here are the color corrections values in EDIUS:
An additional thought: this white reference anomaly (yielding a yellowish image) is really odd, but after all, it is a known fact that white copy paper, or white T-shirts, or even white cloth detergent, have some dose of blue dye to make them look ‘more white’ – see Optical brightener or Bluing. Maybe we’re culturally inclined towards whites that are ‘whiter than white’ – heck, why not.
Beware of the unpredictable colors of Auto White Balance
Finally, here are a few different shots under sunlight (raw frame grabs), with AWB / WB Shift 0 / Color Level 0.

The obvious observation is that the yellow-reddish cast is different in every shot, sometimes quite severe, and therefore these shots will require different corrections to give pleasant colors. Indeed, this is the nature of Auto White Balance: it can be off by various measures – a nightmare when editing because you just can’t apply similar correction across the whole footage, it’s specific work per segment.
But why is it so unpredictable on the HDR-FX7?!? Could it be due to the ‘Intelligent AWB Sensitivity’ feature (AWB SENS)?
So this calls for another test (and another blog post): using fixed white balance (instead of auto), either with the OUTDOORS preset or setting WB manually with a white card.
Hi ouin (or should I call you Stephan?)!
Nice in depth stuff!
I’ll be keeping the neutral setting for my FX7.
Keep it up.