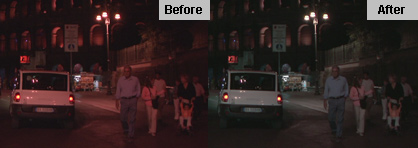
 Have you ever shot video at night, especially in cities, only to realize later on that your picture looks all red, orange, or yellow? This is due to the sodium vapor street lights, also known as broken spectrum lights.
This post brings you a short color correction tutorial, which teaches you how to fix your night shots to remove the red color cast and make them look more natural.
Another opportunity for color correction…
Any question or comment on this article? Come over discuss it on our Editing, media authoring, and color correction forum!
Best practices for shooting video at night
First off, there are some best practices that you need to know primarily, if you want to be able to shoot good video at night:
- Use manual focus. If you leave focus on automatic, focus hunting will occur because the insufficient light prevents the camcorder from locking on subjects.
- Use manual exposure and avoid too much gain. If you leave exposure on automatic, the camcorder will boost exposure by introducing gain, with 2 ghastly consequences: the night will not look black anymore but greyish; and the digital gain will be causing ugly noise in your picture. Gain is okay, even necessary, but not too much. For instance on the HDR-FX7 / HDR-FX7E, do not let gain exceed 9dB, or 12dB maximum maybe. On other camcorders the exact value may be different but the principles are the same.
Here is the original night shot. Although it was taken with an HDR-FX7E, this tutorial can apply to all camcorders.
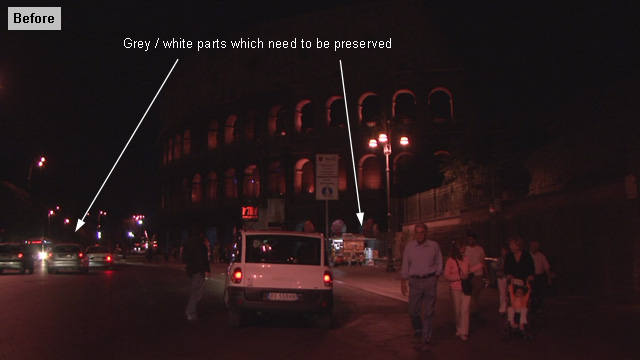
So this picture does look fully red, and that is what we want to correct. Note however that there are 2 spots which have the right color: the grey cars, and the little shop’s white light. This occurs because there are multiple light sources in the scene:
- Everything which is lit by street lights looks red, because the street lights are red. These are called broken spectrum lights because they produce only tiny bits of the whole light spectrum. Compared to daylight, the subjects you are shooting cannot reflect their true color because the light they receive is too narrow. In such situations, Manual White Balance is ordinarily useless because, even with a proper White Balance target (such as X-Rite’s ColorChecker White Balance Card), the camcorder is unable to establish white balance against broken spectrum street lights.
- Those parts which are lit by car lights, or the little shop, have accurate colors because the car lights, or the shop’s lights, are strong enough to overcome the red street lights. This way they are able to provide the subjects with the wide spectrum necessary to reflect their true color.
This, we need to keep in mind, because we will need to fix the red color while preserving the correct parts.
First step: fixing the red color from the street lights
This first step is to apply Primary Color Correction, which means color correction that applies to the whole image. Here we’re going to steer the whole color away from red/orange, therefore applying a strong bias towards the complementary color (cyan). This screenshot was taken from EDIUS Pro, but there are similar features and you can obtain the same results with the 3-way color corrector included in any high-end editing software, such as Apple Final Cut Studio or Adobe Premiere Pro.

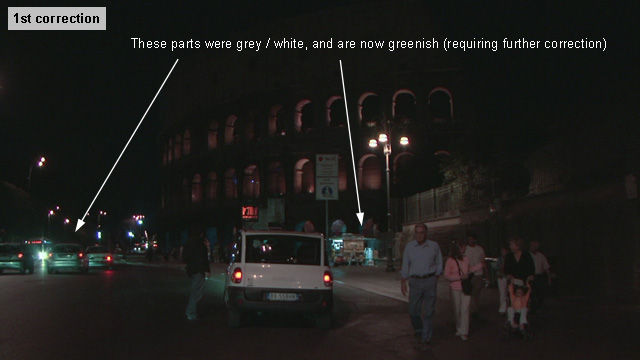
Here is the result: the red cast has effectively been removed. But those parts which were neutral (grey / white) have now turned cyan / green and this needs to be fixed in the final step.
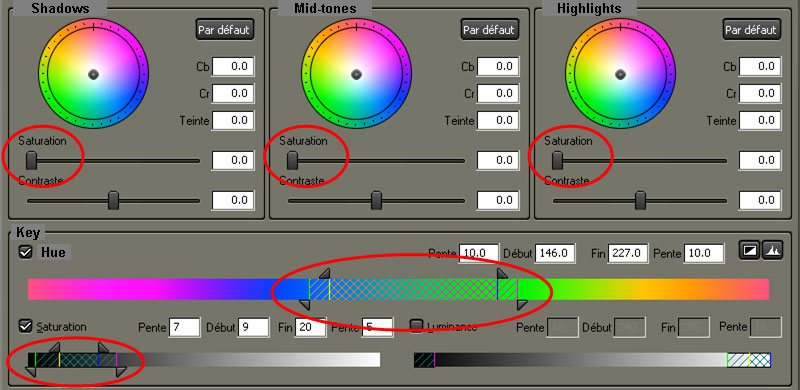
Second step: recovering the grey & white areas
This second step is to apply Secondary Color Correction, which means color correction that applies only to parts of the whole image. Here we’re using an HSL key (Hue Saturation Luminance) to qualify only those parts of the picture which match the specific hue of green that we want to eliminate.
Then the simple trick is to desaturate those parts, that is remove all color from them so they turn grey / white again.
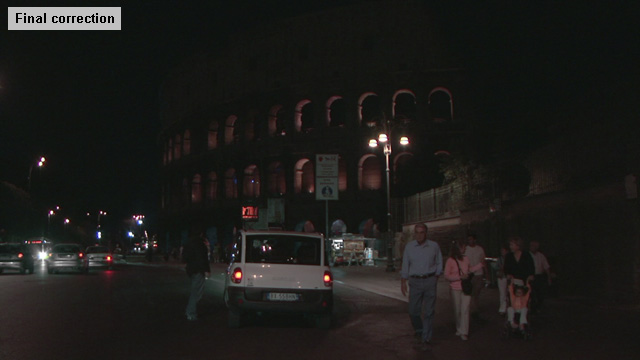
Here is the final result: from the initial horrendous red-looking footage, we have managed to produce much more acceptable video, which looks realistic enough to use in your final edited video without the audience screaming. As the best special effects are those which go unnoticed, here only the well-trained eyes will realize that the video was color-corrected.
Incredibly helpful post. Thanks!
Very nice results Stephan! Thanks man. 🙂
You’re quite welcome Pietro, nice to see you here!